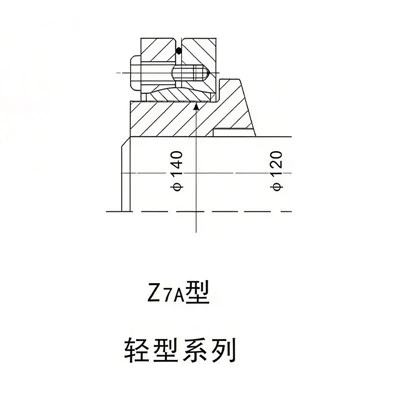

If you’ve ever dealt with a machine that keeps slipping belts, vibrating weirdly, or just not holding parts tight like it should, chances are your shaft locking assembly’s on its last legs. I’ve been in the locking assembly game for over a decade, working with everyone from small woodworking shops to huge packaging plants, and let me tell you—most people don’t realize this part’s not just a "set it and forget it" piece. It’s the unsung hero that keeps shafts, gears, pulleys, and sprockets locked in, so when it breaks or gets damaged, the whole line grinds to a halt. Today I’m walking you through how to diagnose and repair a damaged shaft locking assembly, plus when it’s time to call for a replacement (and which option fits your exact needs).
First, let’s cut through the jargon: a shaft locking assembly is that compact set of components that uses tension or compression to clamp onto a shaft, no keys or pins needed. Most of the damage I see isn’t from one big disaster—it’s wear and tear over time: tiny scratches on the shaft, worn clamp bolts, or corrosion from harsh environments (think sawdust, oil, or outdoor equipment). The first step to repairing it is figuring out exactly what’s wrong, because fixing the wrong thing will just lead to more issues down the line.
Step 1: Do a Quick (But Thorough) Damage Check
Before you even grab a wrench, shut off your machine, lock it out (seriously, don’t skip this—moving parts are no joke), and remove the locking assembly from the shaft. Lay it on a clean workbench so you can inspect every part. Here’s what I look for first:
- Shaft surface damage: Run a flat file or your fingernail along the part of the shaft where the locking assembly clamps. If you feel deep grooves or scratches, that’s a big one. This wears down the friction surface, so the assembly can’t grip tight.
- Clamp bolts: Check for stripped threads, rust, or stretching (hold a bolt up to a new one—if it’s longer, it’s stretched and should be replaced). Even a slightly loose bolt can cause uneven clamping.
- Locking ring or disc damage: For most assemblies, there’s a split ring or set of discs that does the actual gripping. If these are bent, have chips, or the split isn’t aligned right, they won’t apply equal pressure around the shaft.
- Corrosion: If it’s been in a wet or dusty space, rust or built-up grime can get between the assembly and the shaft, acting like a lubricant that kills grip.
I once had a customer with a conveyor line that kept stopping every hour. They thought the motor was bad, but it turned out their locking assembly’s shaft had tiny, almost invisible scratches from old, worn bolts. The scratches let the assembly slip, which strained the motor until it tripped. That repair took 20 minutes, no new parts needed—just cleaning and fixing the bolts.
Step 2: Repairing Minor Damage (The Stuff You Can Fix In-House)
If your damage is just minor scratches on the shaft, worn bolts, or a little corrosion, you can get it back working without a full replacement. Here’s how:
- Fixing a scratched shaft: Use fine-grit sandpaper (2000 grit or higher) to gently buff the surface of the shaft where the assembly clamps. Don’t sand too hard—you just want to smooth out the high spots so the clamping surface sits flat. Once you’re done, wipe it down with isopropyl alcohol to get rid of all dust or metal shavings. Pro tip: Don’t use steel wool—it leaves tiny metal fragments that can scratch the shaft later.
- Replacing worn bolts: Never re-use old bolts for clamping. Even if they look fine, stretch or stripped threads will ruin your grip. Make sure to get bolts that match the exact size and tensile strength of the original—using a weaker bolt is a quick way to break the assembly mid-cycle.
- Cleaning corroded parts: For light rust, use a wire brush (soft, so you don’t scratch the assembly’s internal surfaces) and then the same isopropyl alcohol to wipe everything down. If there’s heavy grease or grime, soak the assembly in a degreaser for 15 minutes first, then scrub and dry completely.
This is the point where I should mention that not all locking assemblies are the same. If you’re working with a lightweight setup, like for small pumps or aerospace parts, your process might be a little different. For those, a scratch that’s barely visible can cause a huge grip issue, so I always recommend checking parts specifically designed for light-duty use—like the Lightweight Shaft Locking Assembly we supply, which uses precision-machined components to minimize wear without sacrificing strength. For heavy-duty stuff, like mining equipment or large conveyors, you’ll want something built to take constant stress, which is why our Heavy Duty Locking Assembly is made with thicker clamping discs and rust-resistant coatings.
Step 3: When Repair Isn’t Enough—Time for a Replacement
I can’t tell you how many customers try to fix a too-far-gone assembly, and it ends up costing them way more downtime than just swapping it out. Here’s the rule of thumb: if the shaft has a groove deeper than the thickness of a business card, or if the locking ring is bent so bad it won’t sit flat, skip the repair and get a new assembly. Trying to clamp a bent or damaged ring can crack the assembly housing, or make it slip so bad it breaks the shaft later.
Not sure which replacement you need? Let’s break down the most common types we supply, so you can pick the right one for your machine:


- Standard Shaft Locking Assembly: This is the workhorse for most general industrial uses—pumps, conveyors, machine tools. It’s reliable, easy to install, and works great for medium load capacities. Find out more here: Standard Shaft Locking Assembly
- Lightweight Shaft Locking Assembly: As I mentioned, this is for smaller, lighter applications where weight is a concern. It’s perfect for things like medical equipment, small robotics, or even food processing machinery where extra weight could throw off balance.
- Shaft Shrink Disc Assembly: Wait, this is a slightly different animal—instead of clamping with bolts, it uses a hydraulic shrink disc that creates super tight, even pressure on the shaft. It’s great for high-torque applications, like large gears or pulleys on heavy machinery. You can learn more here: Shaft Shrink Disc Assembly
- Heavy Duty Locking Assembly: For when standard and lightweight just won’t cut it—think construction equipment, mining conveyors, or parts that handle constant shock loads. These are built to last in harsh environments, so they won’t slip or fail when you need them most.
Quick Pro Tips to Avoid Future Damage
Repairing stuff is fine, but keeping your locking assembly in good shape is way easier than fixing it. Here are the habits I teach all my customers:
- Tighten bolts to the exact torque spec: Most people over-tighten or under-tighten. Under-tight means it slips, over-tight can crack the assembly housing. Grab a torque wrench and follow the manufacturer’s instructions—no guessing.
- Inspect every 3-6 months: I know, it’s a hassle, but a 5-minute check can catch a scratched shaft or a loose bolt before it causes a full line shutdown. Set a reminder in your calendar—you’ll thank me when you don’t lose a whole production shift.
- Keep it clean: Dust, grime, and oil are the enemy. Wipe down the locking assembly during your regular machine maintenance, and avoid letting harsh chemicals get on it unless it’s rated for that (we have assemblies built for food grade or corrosive environments, so let us know if you need that).
- Replace parts at the first sign of wear: Don’t wait for the assembly to slip. If you notice vibration or a noisy pulley, swap the bolts or the assembly before it breaks. It’s cheaper than replacing a whole shaft or motor.
Final Thought
At the end of the day, a damaged shaft locking assembly doesn’t have to be a disaster. Most minor issues are easy to fix with a few tools and some patience. But when things are too far gone, don’t mess around—get a replacement that fits your specific needs. We’ve been supplying Shaft Locking Assembly solutions for all kinds of industries, so if you’re not sure which one is right for your machine, just reach out. We can help you pick the perfect fit, whether you need a lightweight one for a small robot, a heavy-duty unit for a mine, or a shaft shrink disc for high torque.
If you’re dealing with a slipping shaft or want to make sure your locking assemblies are set up right, don’t hesitate to connect with our team for a consultation. We’re here to help keep your machines running smoothly, no downtime required.
References
- Shaft Locking Assembly Installation and Maintenance Guide, Industrial Machinery Association, 2022
- Wear and Corrosion Resistance in Mechanical Components, Journal of Industrial Manufacturing, Volume 18, 2021
- Precision Machining for Locking Assemblies, Manufacturing Today Publication, 2023
- Torque Specifications for Clamping Components, Fastener Industry Standards Board, 2022